Meal Prep Genius: Healthy Make-Ahead Freezer Breakfast Quesadillas
Imagine waking up on a bustling Tuesday morning, feeling the all-too-familiar crunch for time. Instead of frantically scrambling eggs or settling for a sugary cereal, you simply reach into your freezer, pull out a perfectly portioned, delicious breakfast, and within minutes, you're enjoying a warm, savory meal. This isn't a fantasy; it's the everyday reality for those who've discovered the magic of
make ahead freezer breakfast quesadillas. These handheld pockets of goodness are not just incredibly flavorful; they're a true game-changer for anyone looking to reclaim their mornings, eat healthier, and simplify their meal planning.
Why Make-Ahead Freezer Breakfast Quesadillas Are a Game Changer
In today's fast-paced world, finding time for a nutritious, satisfying breakfast can often feel like an impossible task. This is precisely where the genius of make-ahead freezer breakfast quesadillas shines. They offer a multitude of benefits that extend far beyond just convenience:
- Unrivaled Convenience: The most obvious advantage is the sheer time-saving aspect. With a batch prepared in advance, you eliminate the morning rush and decision-making fatigue. Just grab, heat, and go – perfect for busy professionals, parents, or anyone who values those extra precious minutes of sleep.
- Healthier Choices, Simplified: When healthy options are readily available, it's easier to make good choices. These quesadillas empower you to control ingredients, opting for lean proteins, an abundance of vegetables, and whole-wheat tortillas, if preferred. This helps avoid less healthy impulse buys or skipping breakfast altogether.
- Budget-Friendly: Eating out for breakfast adds up quickly. By preparing your meals at home, you significantly cut down on food expenses, making your grocery budget stretch further. You can also take advantage of sales on ingredients, making your meal prep even more economical.
- Reduced Stress & Increased Calm: There's a certain peace of mind that comes with knowing breakfast is handled. No more panicking about what to cook or eat. This small act of proactive planning can set a positive tone for your entire day.
- Customization at Your Fingertips: Unlike store-bought options, these quesadillas are fully customizable. Cater to dietary preferences, picky eaters, or simply your current cravings. The possibilities for fillings are endless, ensuring you never get bored.
Crafting Your Perfect Quesadilla: Essential Ingredients & Variations
The beauty of
the ultimate guide to make-ahead freezer breakfast quesadillas lies in their versatility. While a basic recipe provides a fantastic foundation, don't hesitate to experiment with ingredients to create your signature breakfast masterpiece.
The Core Components:
- Eggs (The Foundation): You'll need about a dozen eggs for a decent batch. Whisk them vigorously with your chosen seasonings. Consider adding a splash of milk or cream for extra fluffiness, though it's not strictly necessary for freezing.
- Flour Tortillas (The MVP for Freezing): For freezer-friendly quesadillas, flour tortillas are strongly recommended. Their pliability and texture hold up exceptionally well during freezing and reheating, preventing cracking and crumbling that can occur with corn or other gluten-free alternatives. If you're eating immediately, feel free to use any tortilla you prefer.
- Shredded Cheese (The Melty Goodness): A good melting cheese is crucial. Cheddar, Monterey Jack, Colby, or a Mexican blend are all excellent choices. Shredding your own cheese often melts better and avoids anti-caking agents found in pre-shredded varieties, resulting in a creamier texture.
Flavor-Packed Fillings & Creative Swaps:
- Protein Powerhouses:
- Ground Breakfast Sausage: A classic for a reason! Opt for pork, turkey, or chicken sausage.
- Plant-Based Alternatives: For a vegetarian or vegan option, try crumbled plant-based sausage, seasoned black beans, or a tofu scramble.
- Other Meats: Cooked and crumbled bacon, diced ham, or shredded chicken can also be fantastic additions.
- Vibrant Vegetables:
- Onions & Garlic: Minced white onion and fresh minced garlic provide an aromatic base and depth of flavor.
- Leafy Greens: Chopped kale or spinach wilt down beautifully and add a nutritional boost without much bulk.
- Bell Peppers: Diced bell peppers (any color!) add sweetness and crunch.
- Other Veggies: Sautéed mushrooms, zucchini, corn, or even roasted sweet potato cubes can be delicious. Ensure all vegetables are cooked through and any excess moisture is removed before adding to the filling to prevent a soggy quesadilla.
- Seasonings & Sauces:
- Taco Seasoning: A homemade blend or your favorite store-bought taco seasoning instantly elevates the flavor profile.
- Other Spices: Cumin, chili powder, smoked paprika, or a pinch of cayenne for heat can add variety.
- Salsa: Use your favorite jarred or fresh salsa within the filling or as a dipping sauce. Just be mindful of excess moisture if adding a lot to the filling.
Step-by-Step: How to Prepare and Freeze Your Breakfast Quesadillas
The process of making these quesadillas is straightforward, but a few key steps ensure they freeze and reheat perfectly.
- Prepare the Egg Mixture: Crack a dozen eggs into a large bowl. Add 1-2 tablespoons of taco seasoning (or your preferred spices like salt, pepper, and a pinch of chili powder) and whisk until well combined and frothy. Set aside.
- Sauté Your Filling Base: Heat a large nonstick skillet over medium-high heat with a drizzle of olive oil. Add your minced white onion and sauté until softened and translucent, about 3-5 minutes. Stir in the minced garlic and cook for another minute until fragrant.
- Cook the Protein and Veggies: Add your ground breakfast sausage (or plant-based alternative) to the skillet. Break it up with a spatula and cook until browned and fully cooked through. Drain any excess grease. Now, add your chosen vegetables (e.g., chopped kale, diced peppers) and sauté with the sausage mixture until they are tender-crisp. Ensure no raw vegetables remain.
- Combine with Eggs: Pour the whisked egg mixture directly into the skillet with the cooked sausage and vegetables. Stir gently with a spatula, scrambling the eggs until they are just set but still slightly moist. Overcooked eggs can become rubbery when reheated. Remove from heat immediately.
- Assemble the Quesadillas: Lay your flour tortillas flat on a clean surface. On one half of each tortilla, spoon a generous amount of the egg and sausage filling, leaving a small border. Top the filling with a sprinkle of shredded cheese. Fold the other half of the tortilla over the filling to create a half-moon shape. Do not overfill, as this can make them difficult to cook and prone to bursting.
- Pre-Cook and Cool: Heat a clean, dry nonstick skillet or griddle over medium heat. Place each assembled quesadilla in the skillet and cook for 2-3 minutes per side, or until the tortilla is lightly golden brown and the cheese inside has started to melt. This brief cooking step helps seal the quesadilla and prevents sogginess upon reheating. Once cooked, transfer the quesadillas to a wire rack and allow them to cool completely. This is a crucial step to prevent ice crystals from forming in the freezer, which can lead to a soggy texture.
- Wrap and Freeze: Once fully cooled, individually wrap each quesadilla tightly in plastic wrap, then an additional layer of aluminum foil. This double layer helps prevent freezer burn and keeps them fresh. Place the wrapped quesadillas into a large freezer-safe bag or airtight container. Label with the date and contents. They will keep well in the freezer for up to 2-3 months.
Reheating & Serving Suggestions for Instant Gratification
The final step in your make-ahead breakfast quesadilla journey is enjoying your culinary creation! Reheating from frozen is simple and quick, offering various methods depending on your desired crispiness and how much time you have.
- Microwave (Quickest): Remove all wrapping. Place the frozen quesadilla on a microwave-safe plate. Microwave for 1-2 minutes, flipping halfway, or until heated through. Be aware that the tortilla won't be crispy using this method.
- Oven or Toaster Oven (Crispiest): Preheat your oven or toaster oven to 375°F (190°C). Remove all wrapping. Place the frozen quesadilla directly on the oven rack or on a baking sheet. Bake for 10-15 minutes, flipping halfway, until heated through and the tortilla is golden and crispy.
- Air Fryer (Best of Both Worlds): Remove all wrapping. Preheat your air fryer to 350°F (175°C). Place the frozen quesadilla in the air fryer basket (single layer if possible). Air fry for 6-10 minutes, flipping halfway, until heated through and delightfully crispy.
- Skillet (Good Crisp, More Hands-On): Thaw the quesadilla in the refrigerator overnight. Heat a nonstick skillet over medium heat with a tiny bit of oil or butter. Cook the thawed quesadilla for 3-5 minutes per side, or until heated through and crispy.
Elevate Your Breakfast with Toppings:
Serve your reheated quesadillas with a selection of your favorite toppings to add freshness and extra flavor:
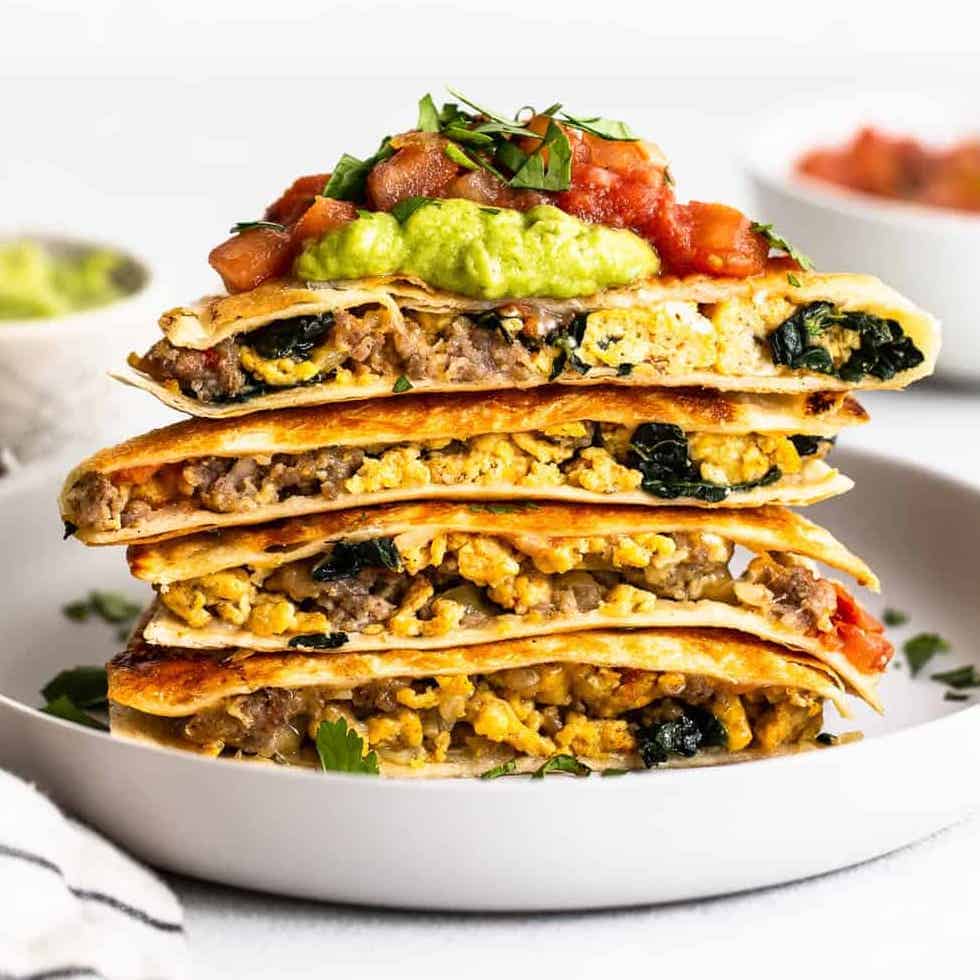
- Fresh salsa or pico de gallo
- Creamy avocado slices or homemade guacamole
- Cool sour cream or a dollop of Greek yogurt
- A sprinkle of fresh chopped cilantro
- A dash of your favorite hot sauce for a kick
Embracing the convenience and deliciousness of make ahead freezer breakfast quesadillas is more than just a meal prep strategy; it's an investment in your mornings, your health, and your peace of mind. With minimal effort on a prep day, you can unlock a world of stress-free, healthy, and incredibly tasty breakfasts that are ready whenever you are. Say goodbye to rushed mornings and hello to flavorful beginnings!